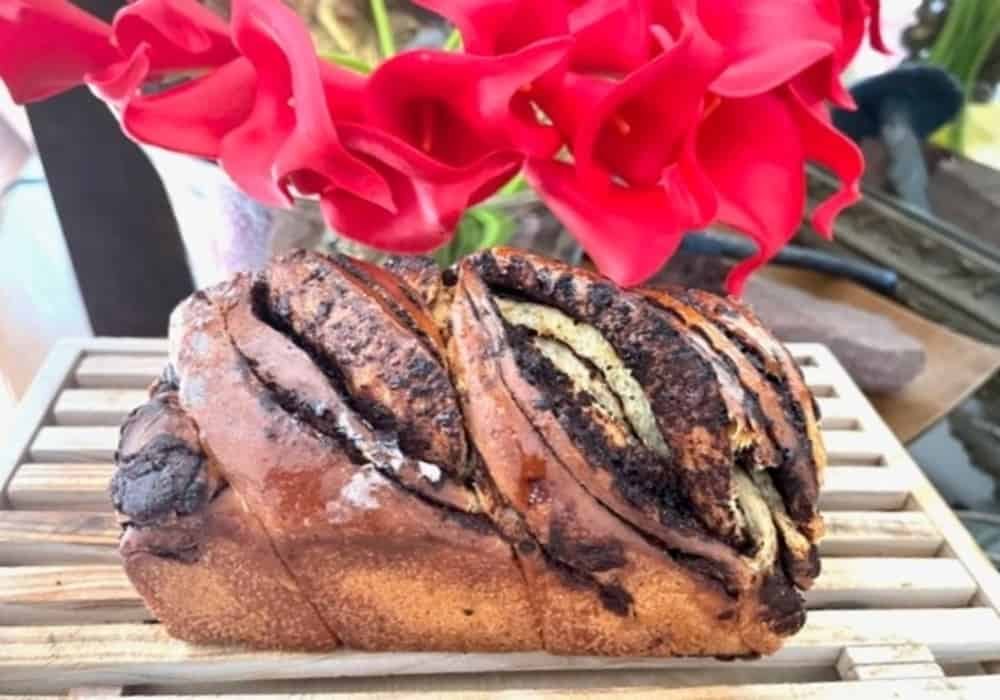
Chocolate Babka Recipe
Chocolate babka recipe with its soft folds and addictive filling, is the brioche that will delight gourmets from breakfast to afternoon tea.
Babka or bobka (in Polish old woman or grandmother) is a cake that originated in Eastern Europe.
More than famous in New York and Paris the babka, which comes from the Jewish tradition of Eastern Europe, is being followed around the world and especially in France and Paris where many bakeries and pastry shops now offer it for sale. Made from twisted brioche dough, this delight is tangy with many toppings, ranging from chocolate, date paste, poppy, gianduja, orange and almond. In short, there is not just one babka recipe but dozens, even if the chocolate one seems to be the one that appeals to the greatest number.
HOW TO MAKE A BABKA?
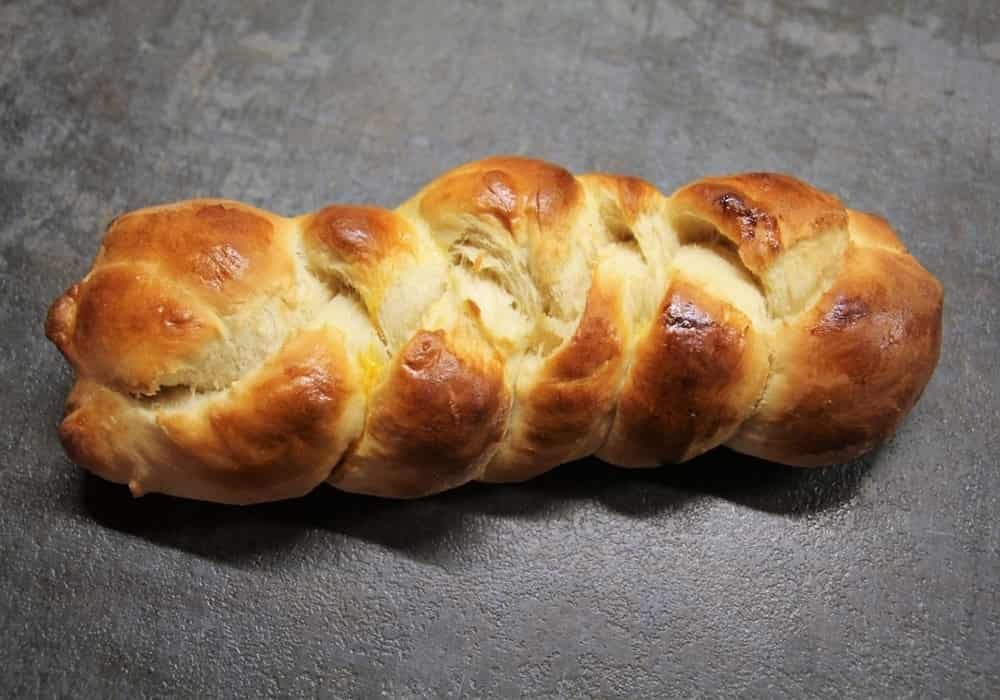
Besides a good recipe, babka needs a little skill to be made to perfection. Nothing insurmountable, but there are a few tips to keep in mind. Indeed, what pleases in the visual of the babka, it is especially its folds which reveal the trim.
To make them, you must first spread your leavened brioche dough in a rectangle on your work surface. The filling is spread over the entire surface of the dough and rolled up to form a sausage. Then, we place it up in front of us, and we gently incise along the entire length. We are therefore left with two half-open sausages, giving a glimpse of the filling. Connect the two half-sausages at the top, then gently twist them together until the end, without “tightening” too much. Then place the babka in a cake mold and let it grow for the second proof. Then just put in the oven and brush with the sugar syrup out of the oven.
For inspiration, here are 20 babka suggestions gleaned from Pinterest that will make you want to get your hands dirty.
Ingredients (dough, chocolate filling and syrup glazing)
For the dough:
3¾ cups (530 g/18.7oz) all-purpose flour , plus extra for dusting
½ cup (100 g/3.5oz) granulated sugar
1 tablespoon (10g) instant yeast
3 large eggs
½ cup (120 m) water
¾ teaspoon fine sea salt
⅔ cup (150 g/5.3 oz) unsalted butter , at room temperature, cut into small cubes
Neutral oil (sunflower, canola) for dressing
For the chocolate filling:
½ cup (50 g/1.7oz) powdered sugar
⅓ cup (30 g/1oz) unsweetened cocoa powder
130 g (4 oz) dark chocolate , melted*
½ cup (120 g/4oz) unsalted butter , melted
⅔ cup (120 g/4oz) chocolate chips or chunks OR 1 cup (100g/3.5oz) pecans, coarsely chopped (optional)
For the sugar syrup (glazing):
½ cup (120ml) water
½ cup (100g) granulated sugar
Instruction to Make Chocolate Babka Recipe
1. Making the dough
Place flour, sugar, and yeast in a standing mixer fitted with the dough hook and mix on low speed until combined. Add eggs and water, and mix on medium speed until dough comes together, 2-3 minutes. Add salt, then butter, adding a few cubes at a time, mixing until incorporated. Continue mixing for about 10 minutes on medium speed, until dough is completely smooth, elastic, shiny, and pulls away from the sides of the bowl. During mixing, you will need to scrape down the sides of the bowl.
Place dough in a large bowl brushed with oil, cover with plastic wrap, and leave in the fridge for at least half a day or overnight.
Grease two 2¼-lb/1kg loaf pans (9×4 inch/23×10 cm) with oil and line the bottom of each pan with parchment paper. Divide dough in half and keep one half covered in the fridge.
2. Making the filling
Whisk together powdered sugar, cocoa powder, chocolate, and butter until you have a spreadable paste.
Roll out dough on a lightly floured surface and shape into a rectangle measuring 15×11 inches (38×28 cm). Position dough so that a long side is closest to you. Using an offset spatula, spread half of the chocolate mixture over the rectangle, leaving a ¾ inch/2 cm border all around. Sprinkle half of the pecans or chocolate chips on top of the chocolate.
3. Shaping the dough
Use both hands to roll up the rectangle like a roulade, starting from the long side closest to you and ending at the other long end. Press to seal the dampened end onto the roulade, then use both hands to even out the roll into a perfect thick cigar. Rest the cigar on its seam.
Trim about ¾ inch/2 cm off both ends of the roulade with a serrated knife. Then use the knife to gently cut the roll in half lengthwise, starting at the top and finishing at the seam, essentially dividing the log into two long even halves, with the layers of dough and filling visible along the length of both halves. With the cut sides facing up, gently press together one end of each half, then lift the right half over the left half.
Repeat this process, but this time lifting the left half over the right, to create a simple two-pronged plait. Gently squeeze together the other ends so that you are left with the two halves, intertwined, showing the filling on top. Carefully lift the cake into a loaf pan. Don’t worry if there are gaps in the pan since the cake will rise and will eventually look fine, even if you feel like it’s messy at this point. Cover the pan loosely with plastic wrap or a wet tea towel and leave to rise in a warm place for 1 to 1½ hours. Repeat to make the second cake.
Preheat oven to 375°F/190°C, making sure to allow plenty of time for it to heat fully before the cakes have finished rising. Remove plastic wrap or tea towels, place cakes on middle rack of oven, and bake for about 25-30 minutes, until a skewer inserted into the center comes out clean with no dough attached.
4. Making the sugar syrup (glazing)
While the cakes are in the oven, make the syrup. In a small saucepan over medium heat, bring water and sugar to a boil. As soon as the sugar dissolves, remove from heat and set aside to cool. As soon as the cakes come out of the oven, brush the syrup over them. Use all of the syrup, accordingly. Let cakes cool until they are warm, then remove from pans and let cool completely before serving. Serve warm or at room temperature.
Babka will stay fresh for 24 hours in an airtight container at room temperature. Don’t place in the fridge.
Babka freezes well for up to 2 months. To thaw, leave on counter or overnight in the fridge.
The secret of a successful Chocolate Babka Recipe
Sometimes adapting the ingredients, sometimes the production steps, until we want to get the result you wanted!
- A brioche should be soft. For it to be, it is essential to respect the recipe but especially the dough growth times. 2h to 2h30 minimum at room temperature (around 77 °F or 25 °C) or, as we recommend here: a night in the fridge.
- Placing the dough in the refrigerator will allow the butter to solidify while allowing the dough to rise. As a reminder (if you’ve read my articles on sourdough, you already know this) cold does not prevent the fermentation (therefore the growth) of the dough: it slows it down. When you take it out of the fridge, the brioche dough will have gained volume and will be firmer than if you had grown it at room temperature. This facilitates the shaping of the babka and allows a more aesthetic rendering.
- You can grow the dough at room temperature for 24 hours or 6 hours in the fridge.
- Film the dough well on contact before placing it in the fridge. Otherwise, it may scab.
- Let the filling cool well before using it. Otherwise, it may heat up your dough and make shaping more laborious.
- Do not hesitate to cover your brioche halfway through / end of cooking. Depending on the power of your oven, it may brown more or less quickly. I do not brown the brioche before putting it in this recipe to keep the pretty color nuances of the babka. I have tried with and without, I prefer without.
- If you are using dehydrated yeast, be sure to activate it by putting it in milk or lukewarm water before using it.
- Brioche dough is often a bit sticky. This is also due to the fact that the brioche dough contains butter (which is what makes it super soft). Depending on the type of flour used and its absorption quality (personally we can use organic T65 (most of the time) that I buy from the mill), the dough can be more or less sticky. If it is too much, add a little flour. Also remember to respect and extend if necessary the kneading time which allows the flour to have time to absorb the liquid. Finally, do not hesitate to moisten your hands to work it, this will prevent it from sticking too much to your fingers.
View this post on Instagram
View this post on Instagram
View this post on Instagram
Sources: PinterPandai, Delicious Magazine, Vogue